

It’s no big secret to those who know me that I’m all about hitting up the thrift stores. In fact, pretty sure about 94% of everything we own is secondhand. I like to try to get as many things out of my spending money as I can, and my husband can tell you I get A LOT of things.
He’d probably also tell you I get too many things, but who asked him?
Naturally, I’m always searching the wonderful world of Pinterest for new upcycling ideas. I found this tutorial the other day and loved the shaggy, vintage, rockout look. So when I went to the thrift store and scored some awesome band Ts, I knew exactly what I wanted to do with them.
So to start, you need to cut the bottom off the shirt, and I just cut right along the hemline for mine.
Keep this for later.

Then you start cutting strips. The tutorial said 6 inches up, 2cm cuts. I’m notoriously known for my inability to be precise in measurements, which usually comes back to bite me in the ass. But this time, it’s ok because we’re not shooting for perfection here. I used my cutting board to cut up 6in, and did about a fingers width for my strips.

Once you’re done with that, you’re going to start knotting the bottom and top strips together. You need to pull on them as you do this to get them tight and give the strips a stretched out look, and yes I did indeed use my foot. If you’re on a table that might be a little difficult, albeit hilarious. Feel free to grab something heavy to set on the shirt as you’re knotting, in case you aren’t so limber.

This will be your finished result.
Now, do the same thing to the sleeves. Once again, I just cut right along the hemline,and cut right up about where the sleeves meet the bodice. Cut your strips, and knot.

Because the sleeves are a tube, the end strips are going to be connected into one big strip, that needs to be cut in half so you get your 2 to knot together. I learned through trial and error to go ahead and cut the sides of your sleeves to make them 2 pieces before you cut your strips, t’s much easier than doing it afterwards.
Once you’re done with that, you once again want to cut right along the hemline and cut off the neckine of the shirt.This is your opening of the bag.
So for the strap, in the tutorial I posted she used 1.5in polyester ribbon. I don’t have that. I do have fabric that I could have easily made a quick strap with, but I had children crawling all over me and didn’t have time for all that. So remember that bottom part you cut off in the very beginning? I took mine, cut it in half, and just threaded it through the sleeves and tied a knot. Does it look like the best purse strap ever made? No..but I’m making a purse out of a tshirt..it fits the theme. And works!


Tada!

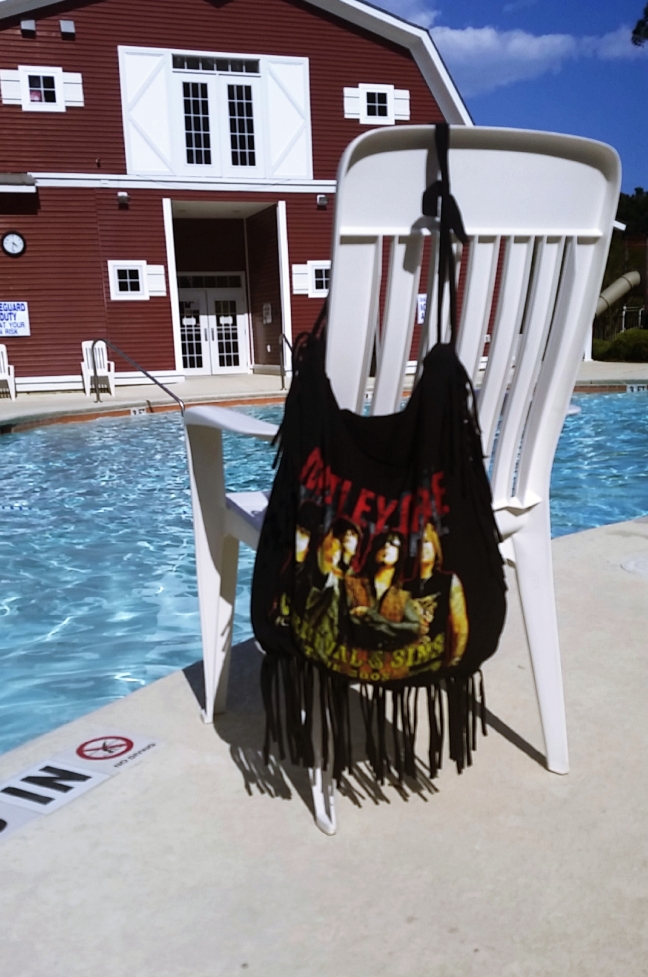
My 3yr old took this shot with my phone, no judgement.

It was perfect to haul to the pool a couple of hours later!
(I LOVE the south and its 90 degree April weather)
Or apparently it works well as a toddler punching bag?

Either way, it’s awesome, and I’m off to search for more Ts to make myself one. My mother has laid claim to this, because, in her words, “Come on, it’s Motley Crue!”
