Just to start, I am fully aware that generally a good diy holiday blog post should be posted at least a week or so BEFORE the actual holiday. That was my plan, but I’m still learning how to schedule my time to sew, blog, and get screamed at by small humans. And while posting a diy bunny blog ON Easter is kind of silly, it is SO me.
So, we don’t really celebrate Easter. We used to do the go-all-out baskets, paint the eggs, do the egg hunts, but I pulled the baskets once my oldest learned the Easter bunny wasn’t legit, and before my middle child knew what an Easter bunny was. Why? Well, the idea of a giant rabbit coming into my house to bring gifts is ridiculously terrifying for one, and secondly the amount of money we were spending on holidays we didn’t really celebrate was getting a little out of hand. So now, we do the egg hunt because those are fun, and this year I wanted to make the kids a bunny because bunnies can be cute, so long as they aren’t gigantic and holding crying infants. So off to Pinterest I went, in search of ideas of how to make a bunny more suitable to my crazy little family.
There are so many out there to choose from. I kept being drawn to these little guys  but decided against making my children completely terrified of rabbits. I am still having nightmares about them.
So I chose this tutorial instead, because they were cute and looked simple enough, right? Yes, it is in German, but if you use Google Chrome that little handy box pops up asking if you’d like to translate.
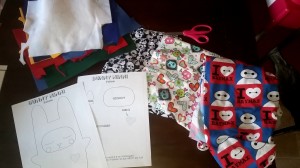 So I printed the pattern (and learned a little German), chose my fabrics, and dug out the stack of felt I’ve had sitting there for the quiet book I planned on starting months ago
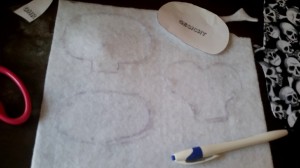
I used their face templates as a general size guide, by the way an actual marking pen would be best for this, but Nikolai went on a fabric coloring spree with mine so I improvised.
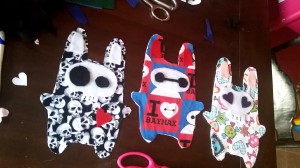
Going left to right, I used woven, stretch, and flannel fabrics. Cotton worked well, flannel was my favorite to work with in terms of turning it, and you’ll see how the stretch worked out soon.
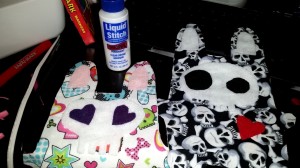
Since they’ll be actually played with, I thought it best to secure the felt first with some Liquid Stitch I had from a previous project. After it dried, I just stitched around the felt to reinforce and add decoration.
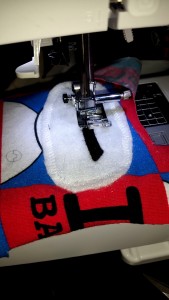
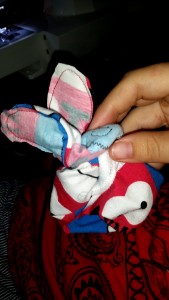
Then pin right sides together, sew and leave an opening to turn, and flip that baby right side out. Then you stuff it with some stuffing you can find at any hobby store. You’ll be surprised at how much stuffing these little guys can hold, my basic rule is when you think you’ve put enough in, grab another handful. Oh and one more thing…

I wouldn’t recommend black pants.
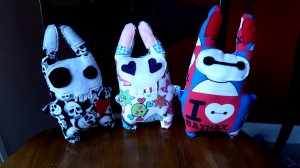
Tada! Now, you’ll notice that Baymax bunny is looking a tad bit…elongated. That’s because I used a stretchy fabric, and didn’t add any interfacing to reinforce it. It was much easier to turn rightside out than the other two, but when it came time to stuff, there wasn’t anything to keep it from stretching as I stuffed. So keep that in mind if you decide to use a nonwoven fabric for your little guys.

Luckily, my little guy didn’t mind the freakishly long rabbit. “Bobot bunny” is awesome, and I have 3 satisfied customers.
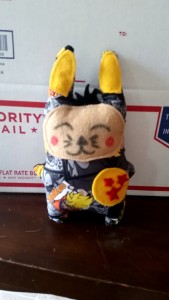
Well, soon to be 4 satisfied customers. Aiden (oldest) wanted to make Daddy a bunny too, so this little guy is currently en route to Bahrain. Yes, that is Dragonball Z. I know, it’s pretty awesome.
Now again, seeing as today is Easter, this doesn’t really help you out for Easter presents this year, my bad. However, rabbits are pretty cool critters all year long…just sayin 😉


Great DIY! Happy Easter!
💗
Emory
helloscarlettblog.com
LikeLike
Thanks so much, happy Easter to you,too!
LikeLike
Very lovely DIY! 😀
LikeLike
Thanks hun!
LikeLiked by 1 person